AWS CookBook 1.6 Connecting to EC2 Instances using AWS SSM Session Manager
#aws/cookbook/security
Introduction
Connecting to EC2 Instances using AWS Session Manager eliminates the need to use Secure Shell(SSH) over internet for command-line access to your instances. Session Manager works by communicating with the AWS Systems Manager(SSM) API endpoint over HTTPS.
Here are some of the security posture increase
- No internet-facing TCP ports need to be allowed in security groups associated with instances.
- We can run instances in private subnets without directly exposimg them to the internet.
- There is no need to manage SSH keys.
- There is no need to manage user accounts and passwords on instances.
- You can delegate access to manage EC2 instances using IAM roles.
Problem
We have an EC2 instance in a private subnet and need to connect to the instance without using SSH over internet.
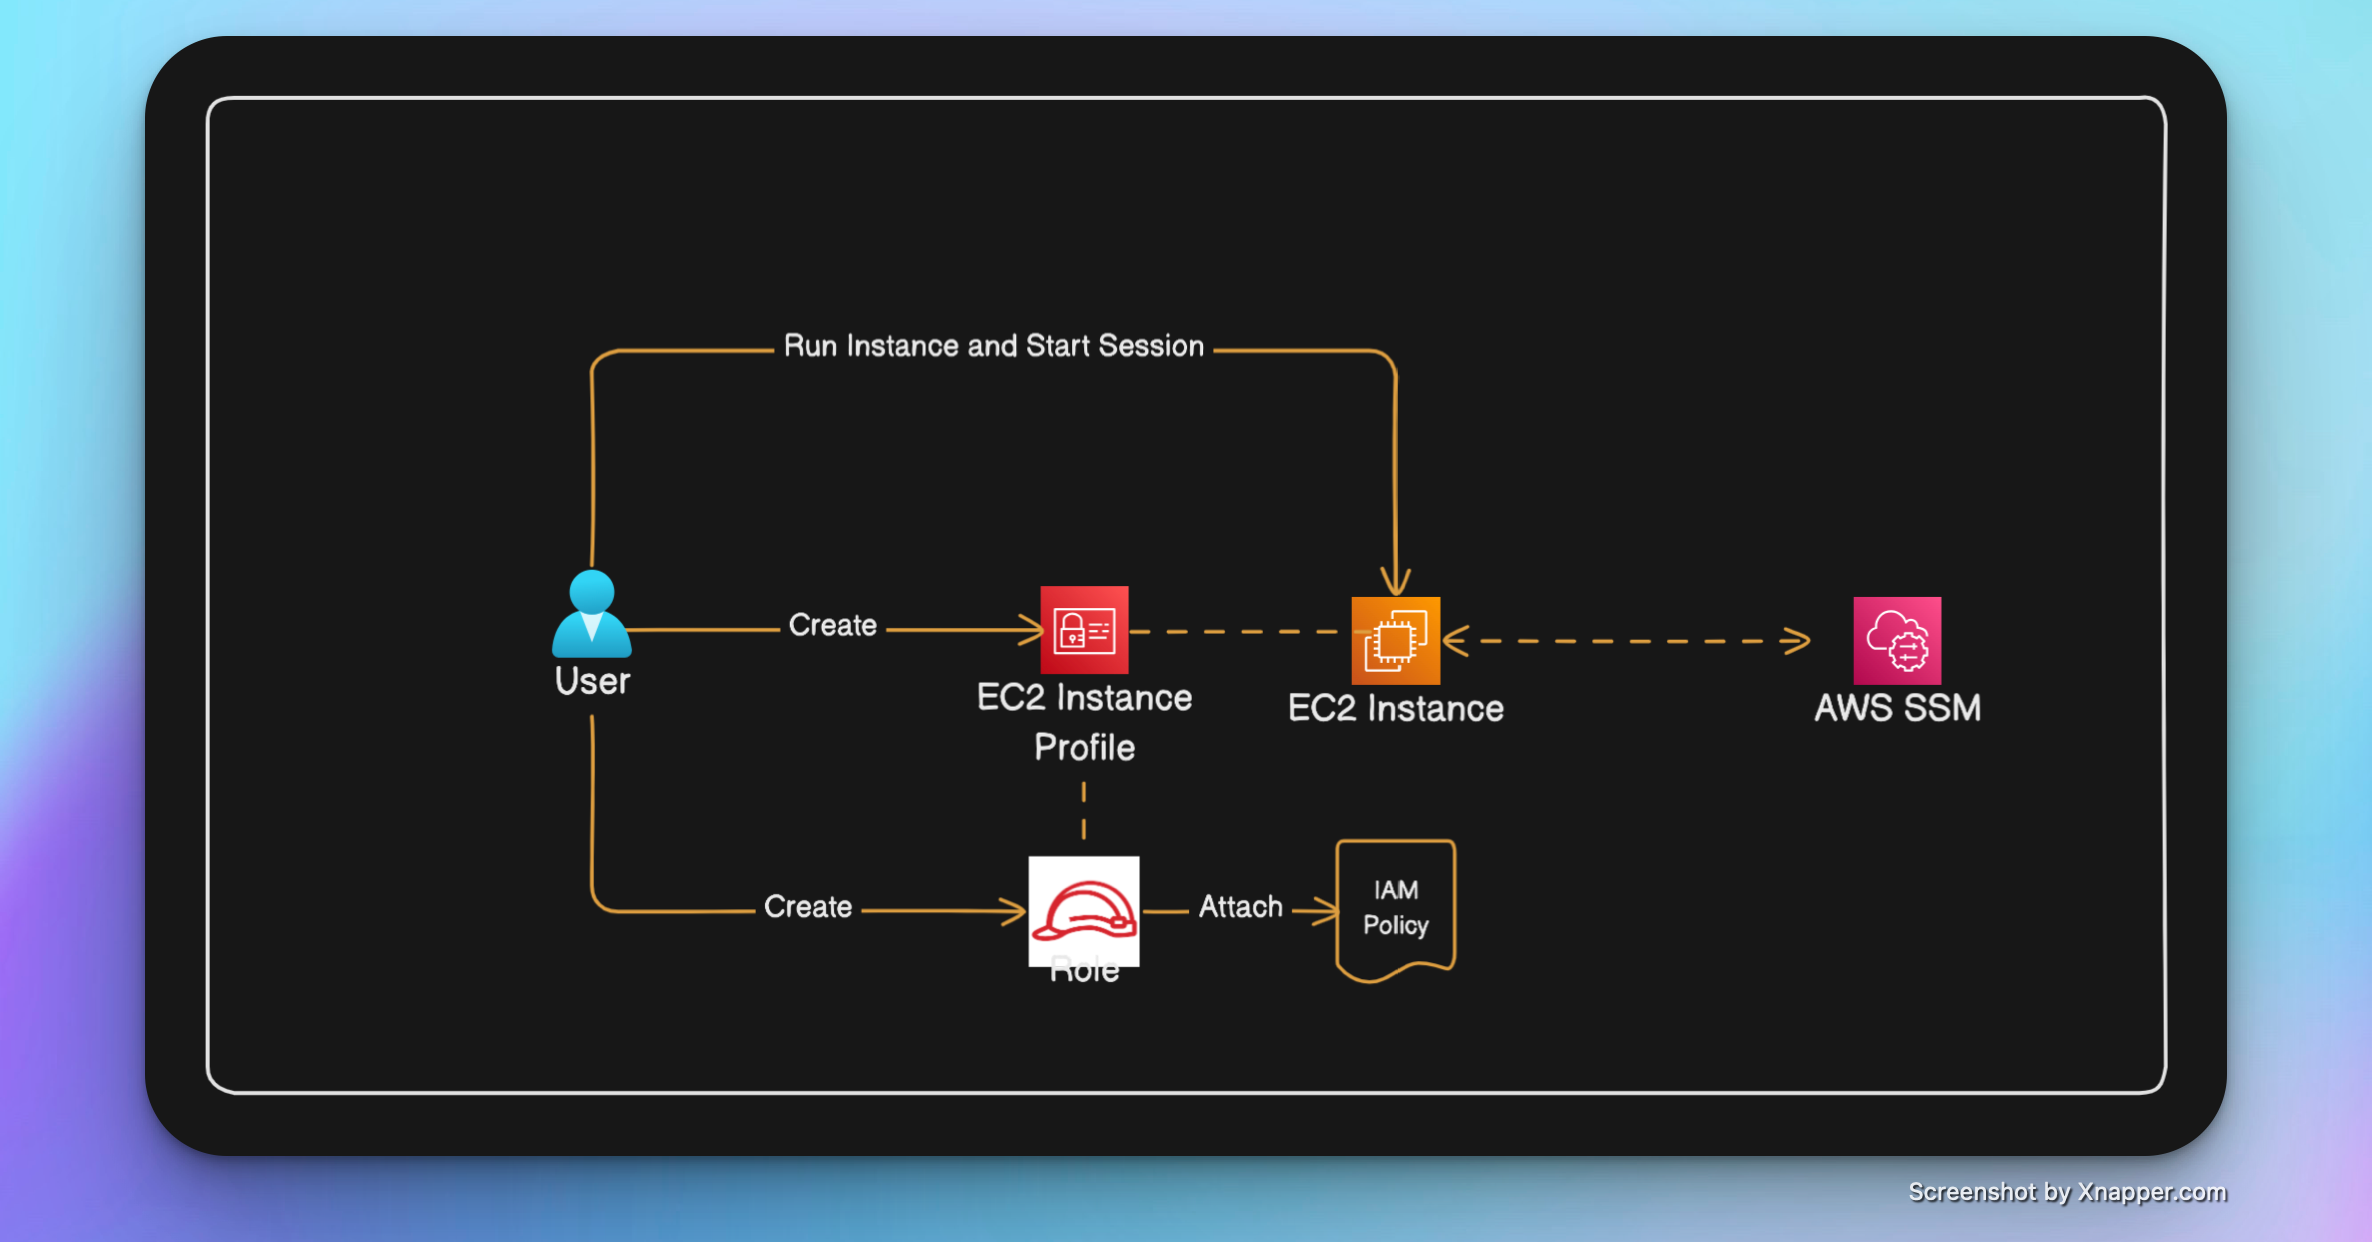
Solutions
- Create an IAM role.
- Attach the AmazonSSMManagedInstanceCore policy to the role.
- Create an EC2 instance profile.
- Attach the role created in step 1 to the instance profile.
- Associate the instance profile to an EC2 instance.
The EC2 instance profile contains a role that you create. The instance profile association with an instance allows it to communicate with other AWS services using the IAM service.
Steps
-
Create an Assume Role Policy JSON and create a role with the same.
{ "Version": "2012-10-17", "Statement": [ { "Effect": "Allow", "Principal": { "Service": "ec2.amazonaws.com" }, "Action": "sts:AssumeRole" } ] }ROLE_ARN=$(aws iam create-role --role-name AWSCookbook106SSMRole \ --assume-role-policy-document file://assume-role-policy.json \ --output text --query Role.Arn ) -
Attach the AmazonSSMManagedInstanceCore managed policy to the role.
aws iam attach-role-policy --role-name AWSCookbook106SSMRole \ --policy-arn arn:aws:iam::aws:policy/AmazonSSMManagedInstanceCore -
Create an Instance Profile.
aws iam create-instance-profile \ --instance-profile-name AWSCookbook106InstanceProfile -
Add the role you have created to the instance profile.
aws iam add-role-to-instance-profile \ --role-name AWSCookbook106SSMRole \ --instance-profile-name AWSCookbook106InstanceProfile -
Query SSM for the latest Amazon Linux 2 AMI Id available
AMI_ID=$(aws ssm get-parameters --names \ /aws/service/ami-amazon-linux-latest/amzn2-ami-hvm-x86_64-gp2 \ --query 'Parameters[0].[Value]' --output text ) -
Launch an instance in an isolated subnet.
INSTANCE_ID=$(aws ec2 run-instances --image-id $AMI_ID \ --count 1 \ --instance-type t2.micro \ --iam-instance-profile Name=AWSCookbook106InstanceProfile \ --subnet-id $SUBNET_1 \ --security-group-ids $INSTANCE_SG \ --metadata-options "HttpTokens=required,HttpPutResponseHopLimit=64,HttpEndpoint=enabled" \ --tag-specifications \ 'ResourceType=instance,Tags=[{Key=Name,Value=AWSCookbook106}]' \ 'ResourceType=volume,Tags=[{Key=Name,Value=AWSCookbook106}]' \ --query 'Instances[0].InstanceId' \ --output text) -
We can now start an SSM session. (We need to ensure that we have the Session Manager Plugin installed).
aws ssm start-session --target $INSTANCE_ID -
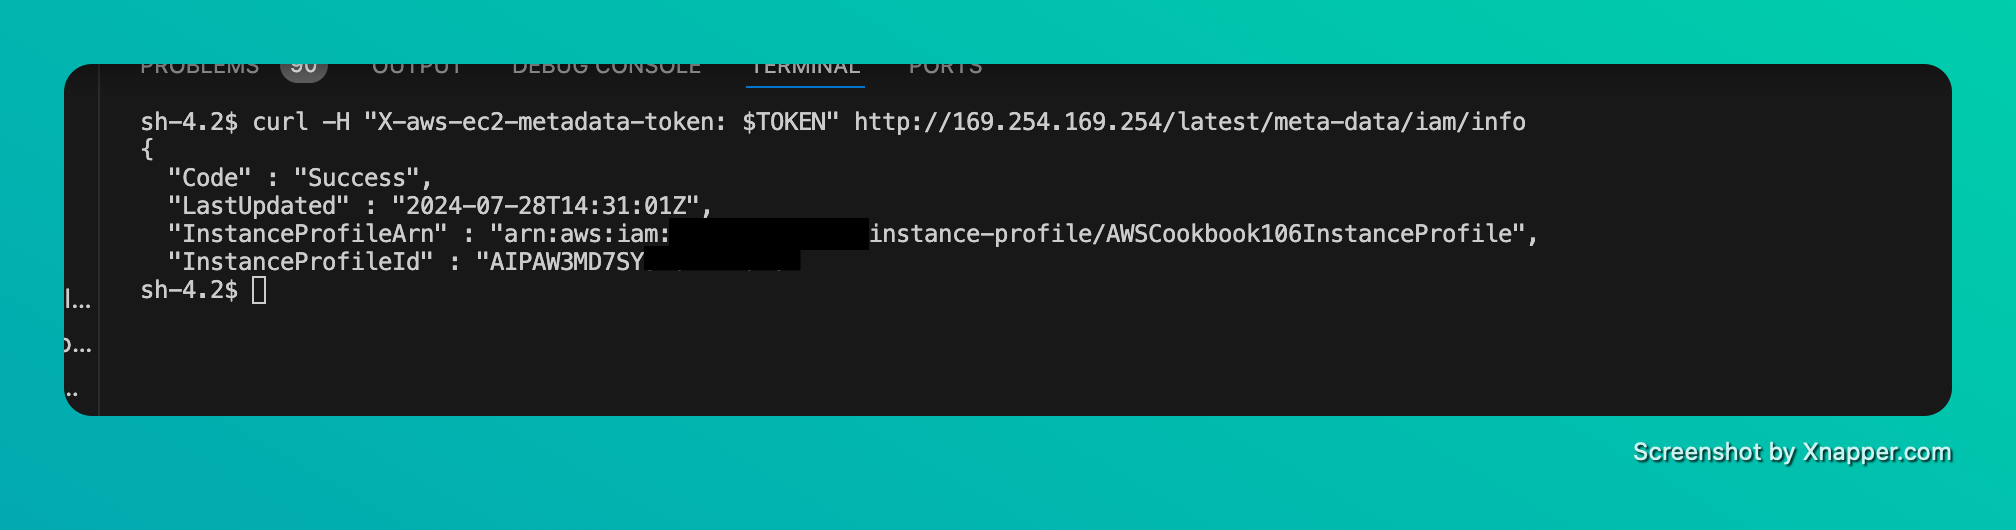
We can see the bash prompt. To validate that we are connected to the EC2 Instance we can query the EC2 metadata token.